- Length: 114 ft-7 in overall
- Beam: 32 ft-3 in
- Depth of Hold: 10 ft-3 in
- Complement: 140-160 men and boys
Armament:
- As-built: Upper deck: 22 x 9 pounder long guns Quarterdeck: 2 x 6 pounders
- By 1815: Upper deck: 14 x 9 pounder long guns and 8 x 18 pounder carronades Quarterdeck: 2 x 6 pounders
Inspiration paintings:
 This is a 3D resin model from Henry Turner. It is beautifully detailed and quite delicate. While trying to drill or install rigging tie-off points, I had several breakouts that I had to come up with ways to repair. I also found that painting the thin rails with cyanoacrylate glue considerably strengthens them enough to hold rigging. Another challenge was creating the Iconic Pandora figurehead and getting it as right as I could at this scale.
Drat! While photographing Pandora I accidently knocked a 1/1200 West Indiaman to the floor. I don't believe it was much damaged until I stepped back to located it. I drug it under my shoe. She lost her bow sprit and foremast in the squall, but the rigging held it pretty much together. Hopefully the repairs won't be too costly.
 |
| Figurehead inspiration |
 This is a 3D resin model from Henry Turner. It is beautifully detailed and quite delicate. While trying to drill or install rigging tie-off points, I had several breakouts that I had to come up with ways to repair. I also found that painting the thin rails with cyanoacrylate glue considerably strengthens them enough to hold rigging. Another challenge was creating the Iconic Pandora figurehead and getting it as right as I could at this scale.
  |
| Note the brass loops for the mainmast stays. A breakout on the starboard side had to be repaired. |
 |
| I just think this class had beautiful lines! |
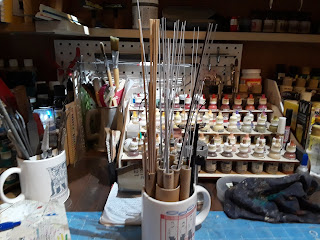 |
| My mast stock arranged by size |
 |
| I had to create a new page for my mast log since I had not built a ship of this size in this scale yet. |
 |
| Masts cut and separated from bow to stern |
 |
| Plastic bread clips make great fighting platforms |
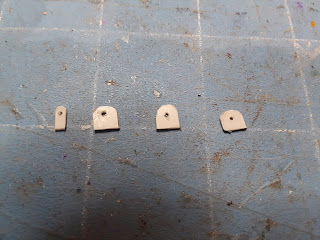 |
| Sprit plate and platforms cut and drilled |
 |
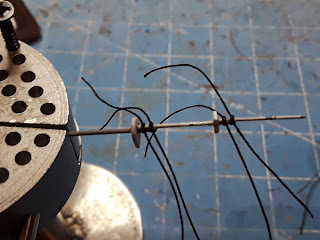
| Mast and top mast |
 |
| T'gallant mast added |
 |
| First mast stage complete |
 |
| Trees added to complete the masts |
 |
| Dry fitted |
 |
| Cloth sails cut out |
 |
| Masts cemented in place |
 |
| Sails tinted and shaped |
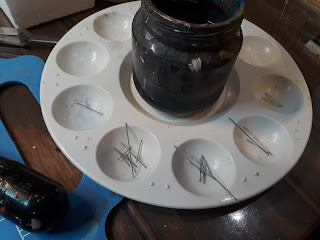 |
| Spars cut and separated by mast |
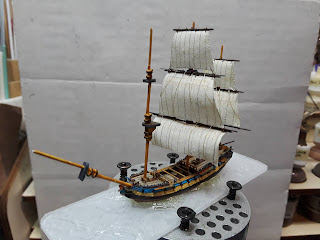 |
| The process is to glue on the spars. When dry, tie them to the mast. Then tie on the sails |
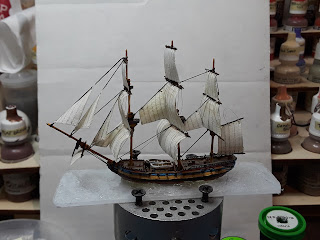 |
| First half of the standing rigging is done. At this point I stop to make the ratlines and get them mounted before continuing the rigging. |
 |
| Ratlines are on and the standing rigging is complete. The last steps are the running rigging and the flag. |
 |
| Best I could do with the figurehead |
Drat! While photographing Pandora I accidently knocked a 1/1200 West Indiaman to the floor. I don't believe it was much damaged until I stepped back to located it. I drug it under my shoe. She lost her bow sprit and foremast in the squall, but the rigging held it pretty much together. Hopefully the repairs won't be too costly.


Lovely work, simply amazing
ReplyDeleteThanks Adam, much appreciated.
DeleteMerry Christmas to you and your family!
Bread clips! Simply genius! Never in a million years would I of thought of that. 😀
ReplyDeleteShip looks fantastic. Well done.
Thank you my friend. Haha, the wife complains I never throw anything away! My response is that I am doing my part for the planet by recycling and repurposing.
DeleteMost impressive details, splendid ship...and scenery, truly superb!!
ReplyDeleteThank you Phil, very kind of you
DeleteGorgeous looking frigate! Lovely lines and rigging!
ReplyDeleteBest Iain
Thank you Iain, Merry Christmas!
ReplyDeleteVol,
ReplyDeleteNow that is a pretty ship! I second the comment on bread ties for fighting tops; that is a great idea.
I've been thinking about buying some 1/650 and 1/700 models and scaling them down to 1/1200 for 3d printing. Do you think that might make them too fragile, or fiddly?
Hello Brian, thank you sir!
DeleteTo answer your question, I believe it depends on what kind of printer you use. Resin is delicate and brittle, PLA is plastic and resilient. This model was a resin print I purchased before I bought a PLA printer. I had also acquired a few 3D printed resin 1/1200 ships. They are just too brittle to even think about building for rigging. I have had a lot of success reducing my 1/700 ship files down to 1/1200 by changing out the nozzle to .03MM or even .02MM on my filiment printer. And with the new ironing feature with Cura 14.1, the detail quality has improved tremendously!
Merry Christmas to you and your family!
Vol
Beautiful blog
ReplyDeleteA most fabulous and inspiring build!
ReplyDeleteMost coincidentally, I found this post (and your blog) while my parents are on a holiday to Norfolk Island. Yesterday they were on a tour hosted by a Mr Christian, a direct descendant.
Well that is something to dream about indeed Paul. And welcome to my blog. Please feel free to use anything you like here, that is why I do it.
Delete