Here is another installment from my good friend Rory McCreadie.
Rory’s Guide to rigging 1-1200 Scale ships Part 4
Extra Bits
Rigging Rings, Launching Ship-Boats, Man the
yard-arms
& Landing-Parties
Sometimes you have no room to drill a hole in
the hull for rigging. This guide will help you overcome this little bump in the
road. In this case it’s the fore- mast stay’s.
I bought a very fine chain from a
Dolls-Houses shop. I think most model shops will sell fine chains (pick the
smallest you can work with)
I cut the second link of the chain to
free the first link. You will lose half the links by doing this, but it is the
only way.
Using a cocktail-stick put some glue at the
point you would have drilled a hole on the out-side of the hull if you had room.
Using the tweezers hold the top
of the ring. Lay the bottom half of the ring on glue on the hull.
Let it dry then do the other side.
Undercoat the ship. I spray mine white.
I check that the rings work and are free with a pin. Do not forget to
check the drilled holes in the hull too.
I have also mucked up Drilling holes. By them braking open at the top (to
near the top of the bulwarks) and have repaired them by using the rings.
From this point, follow the guide for painting.
And rigging.
The rings may look big in the photo’s. But once painted and rigged they
blend into the model and do not stand out. Also they are 1-1200 scale ships!
Launch a ships boat
From the
waist of a ship
You can add bits to the ships to make them look different, which can be
nice to look at and help identify ships in a fleet game.
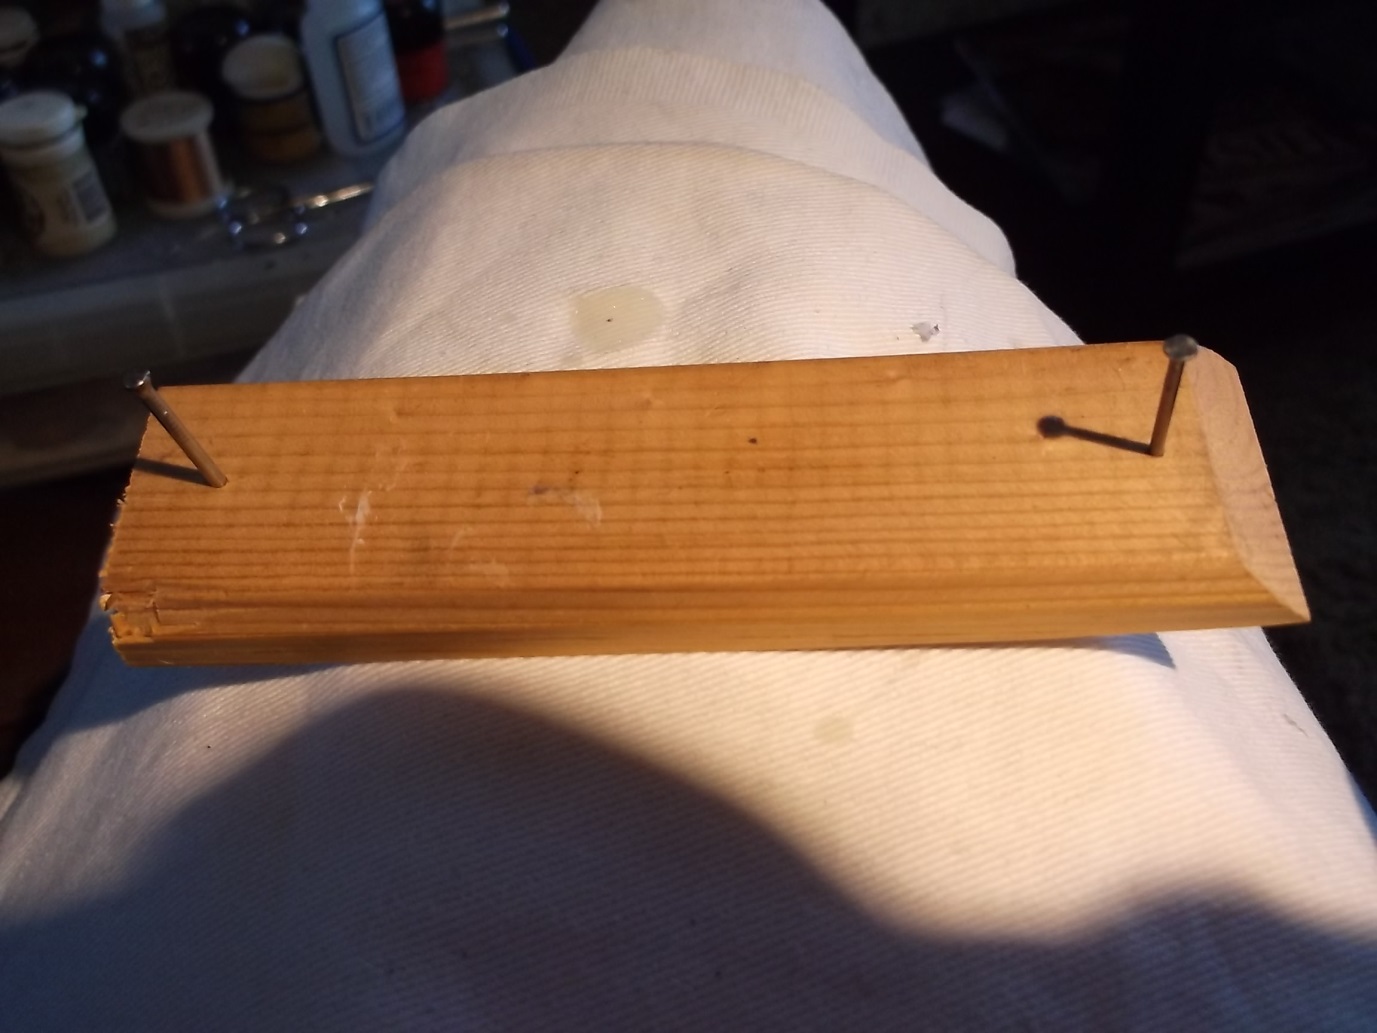
You will need the jig you used for the flag mounting (see part 3). Cut an
angle at one end of the jig.
Take the light coloured thread you used for the running rigging. Tie and
glue one end to the top third of the thick back-stay between the fore and main
masts.
Make a long loop with the thread
Tie and glue the second end around the lower
third of the back stay
Cut away the two ends which are tied/glued
to the back stays
Lay the ship on the angled end of the
jig and loop the thread around the far nail (If it is too long tie a knot in it
so it fits the jig)
Lay a painted ship’s boat on its side
with it facing away or outward from the ship. Have the ship’s boat about half
way down the ship’s side on the thread and glue.
Cut a shorter (not too short) thread and
glue it across the underside of the boat’s keel. I do between the ship and the
ship’s boat (or the inside).
Tie and glue the stern end to the front
of the mainmast rat-lines as low as you can.
Then tie and glue the bow end to the front edge of the foremast
rat-lines.
Cut the ends of the two end bits on the
rat-lines.
Take the ship off the jig and cut the loop
Add glue to the sides of the ships boat
and roll the thread around the sides of the ships boat. I did not photo this
part sorry! Hold the ships boat down with a cocktail-stick and pull the thread
up so the thread lies on the glue coated sides of the ship’s boat. Wait a
minute or two for it to dry. Do the bow or stern one at a time. The ship’s boat
should now be up-right.
Tie and glue the stern line of the ship’s
boat to the end of the main course yard arm. Tie and glue the bow line to the
end of the fore course yard arm.
Cut the ends of the two threads at the
ends of the yard arms.
I found that the ship’s boat is too
light to hang right. I coat the lines with glue to straighten them. This makes
the ship’s boat look heavy.
I did all this before doing the running
rigging. It looks better on an “At Anchor” or “Top sail and Jib” sail setting.
Man the Yard arms
Land the troops
The idea came from years ago. I saw a
game at a show in the 70’s in London. It had a game using hair-roller armies.
They played 5mm size game. I did not understand scales at the time; to me they
were just tiny. I’m a hairdresser. I was making a “At anchor” 1-1200 scale ship
and I went a to hairdresser’s wholesaler. I saw the rolls and bought a pack.
David Manley showed me an article by
Andy Callan after I made the first manned yard-arms model. It was about the
armies I saw years ago. I’m using this article for my landing-parties, but I
must make them smaller than 5mm scale in the article to work with the 1-1200
scale ships.
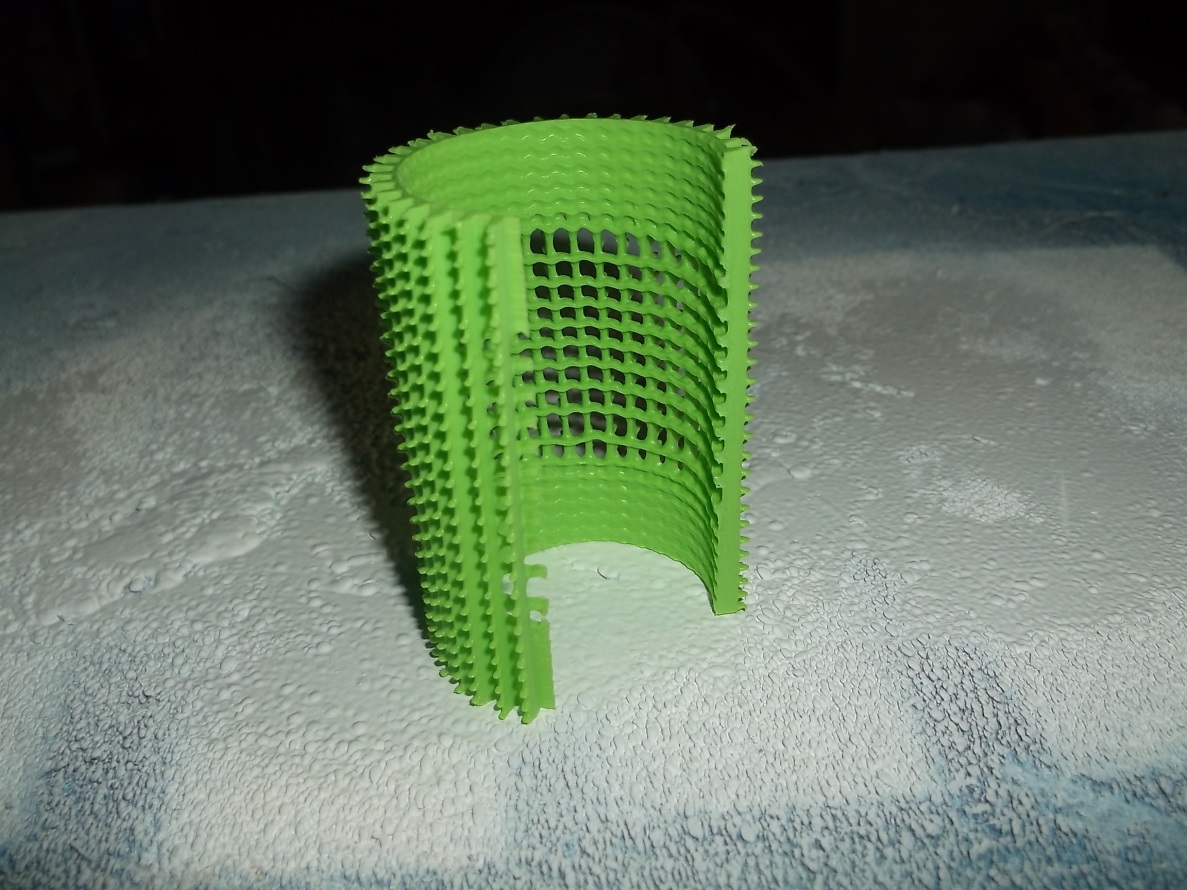
I cut open the
hair-roller
I look at the roller as two parts. The
open weave middle and the closed weaved ends. I will use closed weaved bits for
my landing-parties.
I cut a line from the roller and a block
for the landing-parties. I will come back to the landing-parties.
I cut the strip in half long-ways. I use
the top thin spikes.
I added glue to the yard-arms and laid
the top half of the roller strips against the back-side of the yard-arm.
Once dry I cut off the extra and repeat on the
rest of the mast.
The finished masts do not look great. It is the
painting that makes them look right. I spray the masts white.
After painting the sails and the yard arms,
not the masts, I painted the crew. Each spike and below them I paint a white
thin line. As the crew walk behind the yard-arm I only did the back half. The
body I painted blue, this time all around the spike. I know it sounds wrong but
I made all of the sailors bald with flesh paint. To paint hair at this scale
does not work as well.
After painting and rigging. It looks like this.
In some games you need landing-parties.
This can become very hard and expensive. As they would only be used once or
twice a year, at the most. It would be best to spend the money on ships. Going
back to the roller, again. Cut a block from the closed weaved ends, as long as
you like and glue onto a base. As the roller is curved you must hold it down as
the glue sets. See above photos. I use a British 2 penny coin (1inch or 25mm
across) as a base for all my small stuff, ship boats, gun batteries and now
landing-parties. I add “Green Stuff” around and between the lines. This makes
them look a bit dome like, but makes them look smaller.
I sprayed them green. I will do different colours for different bases for
different parts of my shore-line, town and harbour, in time.
With the spikes and a little of the
bases lines showing, you get the same size as on the yard-arms.
Paint all the spikes and a line upwards on the
base bar (To match the spikes) white. Pick out one or two spikes and paint the
spike blue for the officers coats. The white line under the blue, becomes the
(white) legs. Add flesh on the top of the spikes. Put a tiny bit of black on
the officers heads for hats, to finish. This gives you a group of sailors with
officers, as a landing-party. I did not add dark or blue coats to the sailors.
You will see why in a minute.
Most landing-parties have Marines in
them. For Continental Marines I painted the whole block as I did for the officers
in the sailor’s blocks, blue. For British Marines I painted the top half red
then flesh, then black. On the photo below you can see Continental Marines on
the left and British on the right. This also means you can have enemy troops
ashore to fight your landing-parties. You can pick a Napoleonic army to paint
up, as a defense against your landings.
Langton’s make shore batteries and I’m
working on cavalry. So far they are coming along nicely. But not ready to show
yet.
I Flocked only around the edges as to do the middle would drown the
tiny troops. I think they work with the 1-1200 scale on the board
I hope this guide, with the first 3
parts helps you with your games and modelling, in part or fully. Rod Langton of
“Langton Miniatures” has seen and O.K.ed this guide. His book “A Guide to:
Assembly, Painting & Rigging of Napoleonic Naval Models in Scale 1:1200” is
a must have and is my bible in this small world. Vol is my over the pond
friend. A man I wish lived closer to me in body. Have Fun and remember your
mistakes are just “Miss takes” which can be redone or painted over. Vol, on his
blog “A Miniatures hobby Room” or me at devsdoc@hotmail.com
will always try and help you out.
Be safe
Rory
At home in Christchurch, Dorset,
England. 2014


%2BBash%2B001.JPG)
%2BBash%2B002.JPG)
%2BBash%2B003.JPG)
%2BBash%2B004.JPG)
%2BBash%2B005.JPG)
%2BBash%2B006.JPG)
%2BBash%2B007.JPG)